

DataForge assessment and migration jobs can be scheduled to run at specific times and durations. You can adjust migration performance depending on your environment needs.
You can slow down or stop the migration job during office hours to not affect users, or copying at a low impact rate.
Please note: The performance scheduler is a global setting that will affect all jobs created.

Definitions
Normal (Green)
All available network and storage resources will be used.
Zero Impact (Yellow)
Only four threads are used per migration node across all jobs. Generally speaking, this will have the affect of 4 users accessing data at one time.
Paused (Red)
All assessment and migration jobs are on hold during this period. No resources are used.
Save button: Sets your schedule choice.
Reset All button: Sets the default schedule to all green.
Create a Schedule
How-To
When you first land on the Performance Scheduler page, you will see that the entire schedule is green. This means that for all days and times, every job will be running at full resources. This will let you choose day/time blocks to slow or pause all jobs.
You can use multiple performance types across the entire schedule.
Please note: You will not see your choice color change until you click the Save button.
For each change, choose what type of performance you want to schedule from the right side. Green, Yellow or Red.
To choose a day/time block, you will move your mouse cursor to the block you want to schedule and you will see your cursor change to a plus symbol. Click the first block and drag it to the next time and/or day block you want. Click the Save button. You should now see the corresponding color of your choice on the calendar.
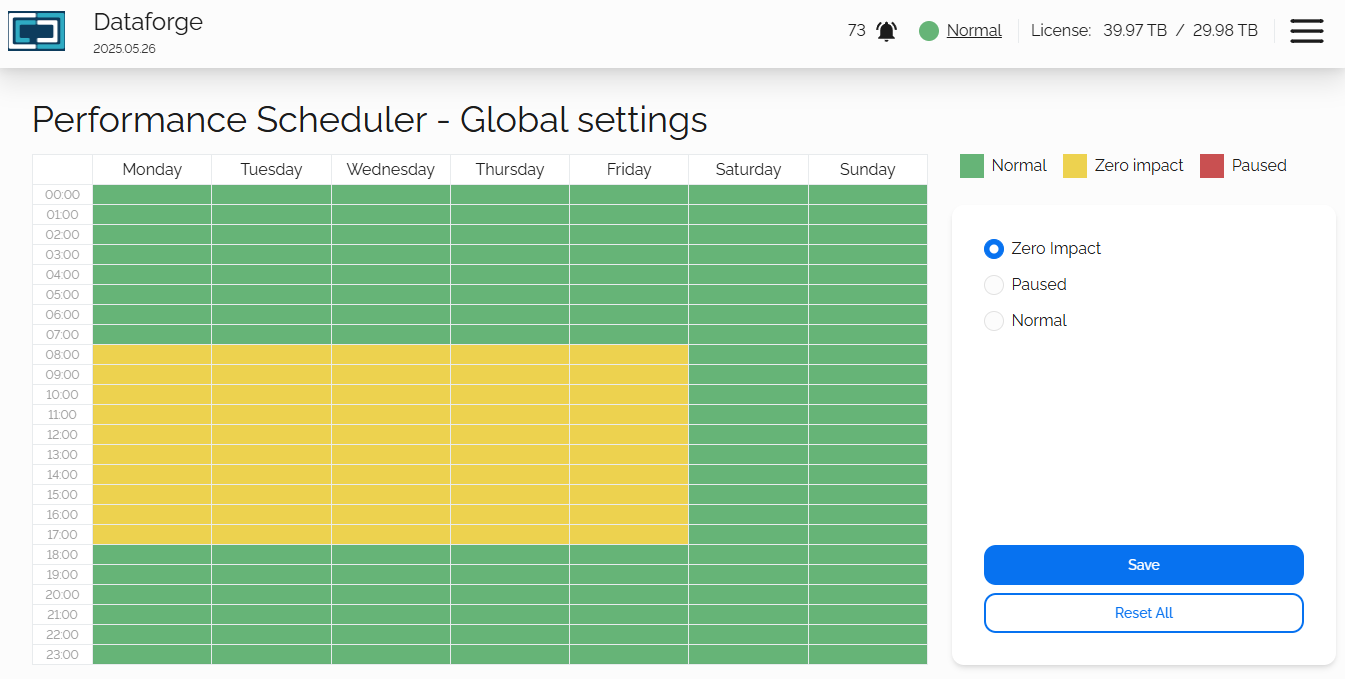
Simple Example
In this example we will set the Zero Impact schedule to run from 8am until 6pm Monday through Friday. This will allow for a low impact migration to continue in a typical work week, which would have a low-to-no impact for your users. The rest of the schedule will be normal and your migration jobs will run with all available resources.
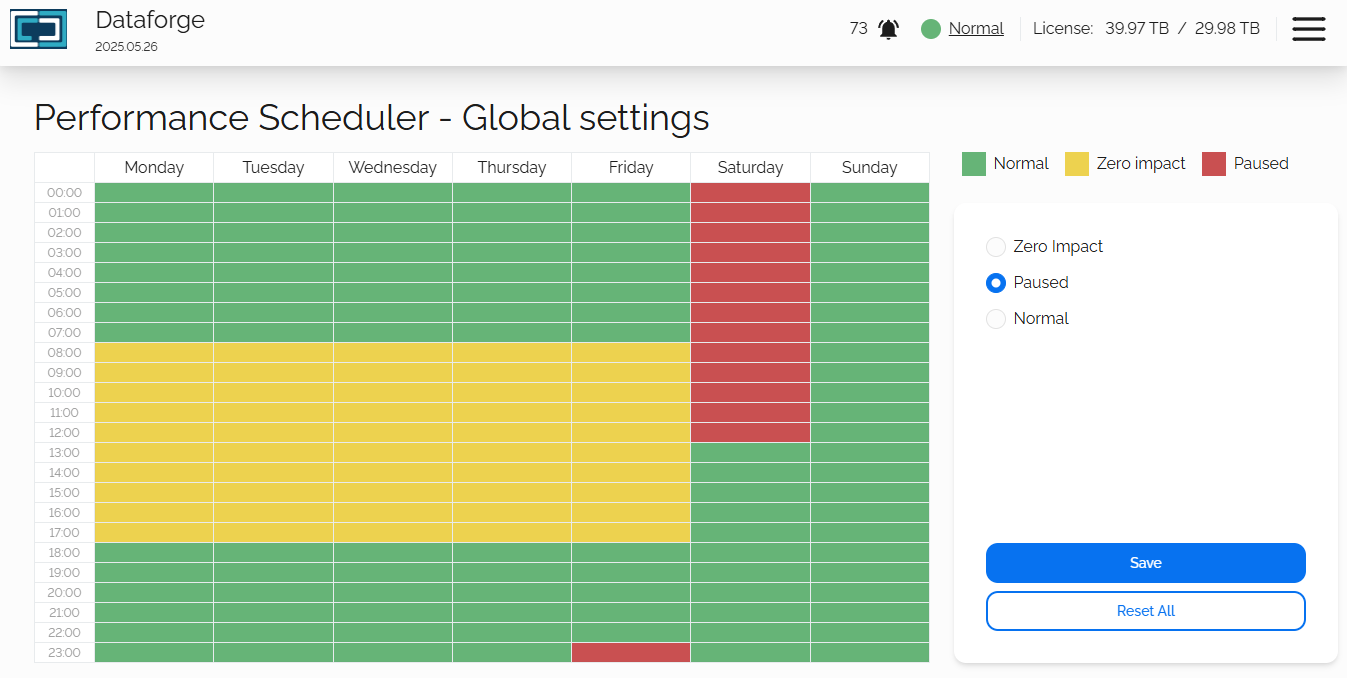
Medium Example
In this example we will continue from our simple schedule and add a Paused time block on Friday 11pm that will last until Saturday at 1pm. This may reflect an organizational backup schedule or some other type of black out period.
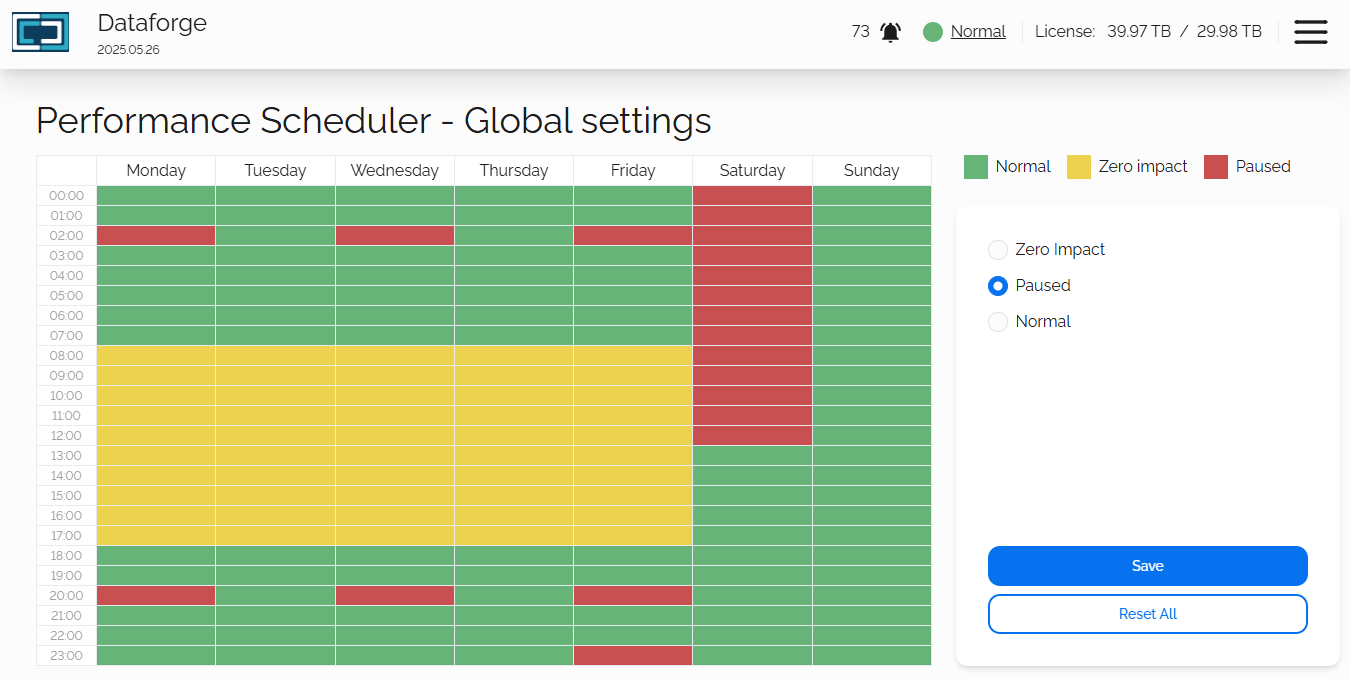
Complex Example
We will continue on from medium example to pause all jobs every Monday, Wednesday and Friday at 2am until 3am and 8pm until 9pm.
Final Example
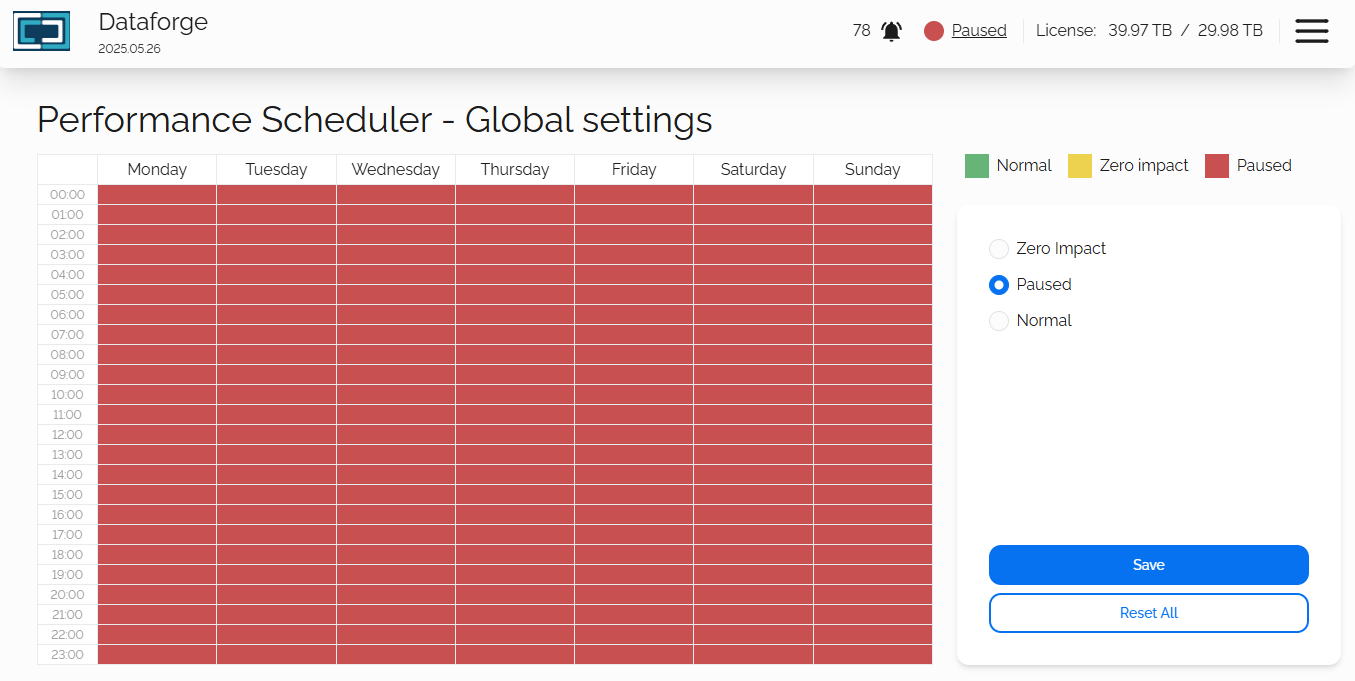
In the previous examples, we started out with the entire week being Normal (green) performance and working around that. Let's do the opposite here and start out with a completely Paused (red) schedule and only add the days/times that we want to migrate our data.
Choose Paused as the performance option and select the entire calendar, click the Save button. Your schedule should look like this:
Now we can select which days/times to run our jobs:
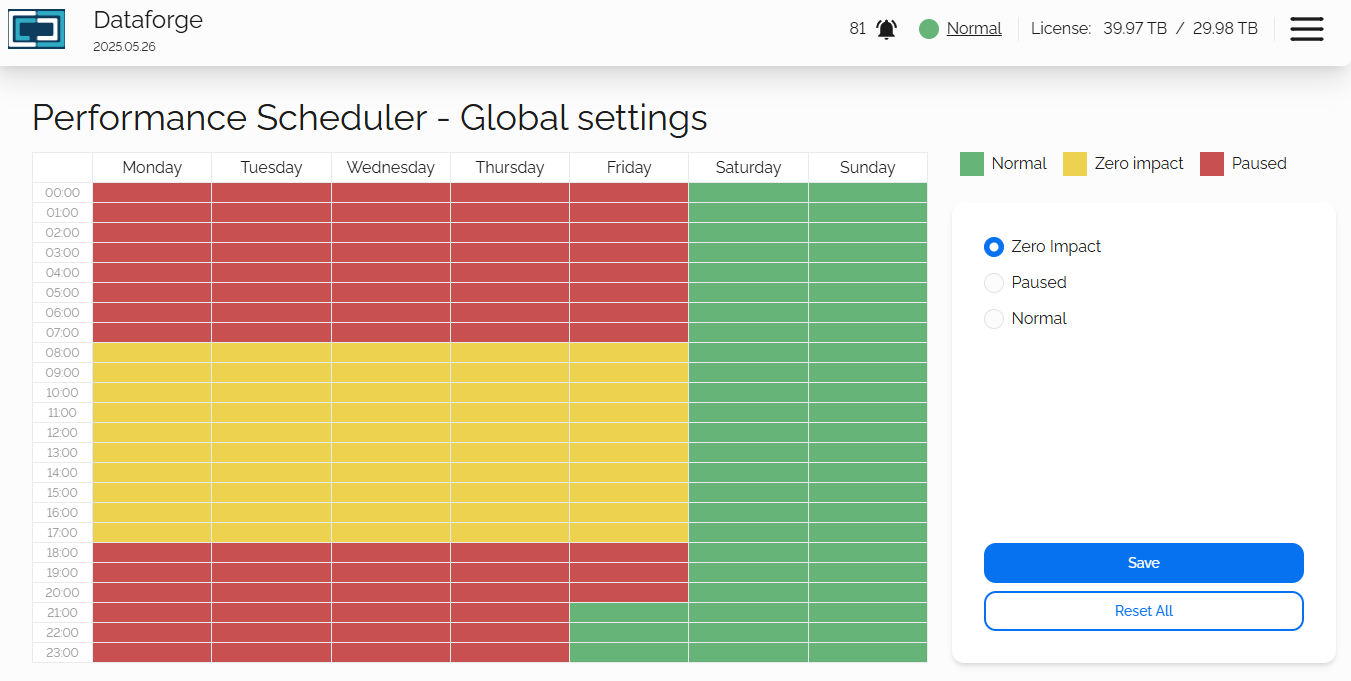
This example shows us:
- All jobs paused weekdays from 6pm until 8am
- Zero impact Monday through Friday, from 8am until 6pm
- Normal migration from Friday at 9pm until Monday at 12am

